Hi there! It is hard to get back in the swing of things. I'm working on it. And sometimes I think to myself what in the world can I post about and I think I have a great idea and then I can't seem to find the time to get out on the blog to actually post it. So I'm making a deal with myself, no pressure posting but at least post a couple times a week. And see where it leads.
So that's what I'm doing. I'm making it happen!
And you know, really it's like exercise. You have to make the time for it because there is never enough time.
Here's the thing. I have some big plans I want to execute on and in order to do that I have to have a real plan, and I believe keeping up with regular posts on this blog are really going to help me execute on those other plans. So watch out world! LOL!!
Now. With all that being said, what in the world am I going to post about today? I'm going to post about socks! Yes! That's right. Socks. Knitting socks in fact.
You see, I knitted my first pair of socks about.... four years ago. My lys (local yarn store) had a sock a month a few years back where they featured a pattern and yarn and treated it like a Knit-A-Long with prizes for those who completed the socks within the time frame. I really wanted to like knitting socks. But.... I did not. Using those double pointed needles was the worst thing EVER. So I decided I would never knit another pair of socks again.
After a while though, a friend kept telling me I needed to learn magic loop and knit socks that way. I thought she was crazy. Because how could any method make knitting socks fun? I resisted for a long time until I got a bug to knit these incredibly cute little Owl Puffs. In order to make these fun little guys, I learned magic loop. And guess what? I liked it!
Once I'd made a few Owl Puffs and then using magic loop to finish off a couple of projects I really liked the magic loop.
This new found enjoyment of a new to me knitting method, combined with my epic project of knitted my family Christmas Stockings, which are just really large socks, I decided to give sock knitting a second chance. Who would have ever thought, certainly not me, that I would now be addicted to knitting socks. Since the Fall, I've made five pairs of socks with number six on the needles. One other thing I'm enjoying is learning heels.
I will write up another post on socks and actually include pictures in that one. If I can figure out how to do that. My. My. How things change when you're not around for awhile. So yeah. I will have to relearn the upload and adding of photos. In the meantime. Yay! I posted!!

Wednesday, March 26, 2014

Wednesday, January 22, 2014
Well, It Took Awhile
Well..... It took me longer to work my way back to the blog than I originally thought. December and the first half of January were an emotional roller coaster rides for me and my family and things just didn't go as planned. So I'm giving myself a big break on the bloggy thing.
Still, I have been wanting to do more journaling of day to day things and my hobbies and crafts and just life in general. So I will try to post more often.
With that being said. I have goals I plan to set for myself for 2014.
First - Be more Spiritual. Faith is important to me and I need to spend more time focusing on it.
Second - Spend more time on me. I hardly ever spend time on me. I need to pamper myself more often.
Third - Enjoy my family time more. It's important to make memories.
Fourth - Be more active. Speaks for itself I think.
Fifth - Be more creative.
Those are kind of general, but still good none the less.
Still, I have been wanting to do more journaling of day to day things and my hobbies and crafts and just life in general. So I will try to post more often.
With that being said. I have goals I plan to set for myself for 2014.
First - Be more Spiritual. Faith is important to me and I need to spend more time focusing on it.
Second - Spend more time on me. I hardly ever spend time on me. I need to pamper myself more often.
Third - Enjoy my family time more. It's important to make memories.
Fourth - Be more active. Speaks for itself I think.
Fifth - Be more creative.
Those are kind of general, but still good none the less.
Sunday, December 1, 2013
Greetings!
Hi everyone! It's me. That Tess Girl. And I'm blogging... Again. Well, I thought I'd see if I could manage to work in a blog post or two ever so often. This blog has been neglected for oh so long! Actually, all my blogging has been. I just haven't seemed to have any time to everything I would like to do. So some things had to give and my internet world was one of those things. I am still online just not as active. More like a lurker for the most part.
Well, I think I am going to start trying to get back online. I'll post more details on what's going on as they come to me. But for the most part, this blog will most likely be a craft related blog. Since that seems to be where the bulk of my creativity is at lately.
Since I felt weird just jumping right back into posting without some form of I'm back post, I'm going to leave this blog post at this. And I'll post more goings on soon.
Well, I think I am going to start trying to get back online. I'll post more details on what's going on as they come to me. But for the most part, this blog will most likely be a craft related blog. Since that seems to be where the bulk of my creativity is at lately.
Since I felt weird just jumping right back into posting without some form of I'm back post, I'm going to leave this blog post at this. And I'll post more goings on soon.
Friday, March 18, 2011
Dying with Kool-Aid
Last year, I decided I wanted to give my hand a try at dying yarn. I'd been seeing a lot of craft projects worked up with hand-dyed yarn and thought it looked so amazing. The trouble with this plan is 1) I'd never dyed yarn and had no clue what to do and 2) Little fingers getting into the dye and getting hurt. But then I saw where people had dyed yarn using Kool-Aid. You know that drink from your childhood. So I thought, Awesome! This is something I can try and it's non-toxic.
So I did.
Here's the process I used to Kool-Aid dye two skeins of Debbie Stoller's Full 'O Sheep 100% Natural Wool (colorway Little Lamb).
 First: Unravel you're yarn and tie loosely. This will allow the dye to reach all the yarn.
Fourth: While you're yarn is soaking, you want all the yarn to get good and saturated, fill a pot with water and let that water start to warm on the stove.
Fifth: Just before the water starts to boil, remove from heat and drop in your Kool-Aid packs and give it a stir.
 Sixth: Gently place your presoaked yarn in the Kool-Aid water. Stir gently around to help the dye reach all the nooks and cranies of the yarn or just swirl around to help create a kind of tie-dyed effect. Becareful not to cause too much agitation however, because you do not want to felt the yarn.
Seventh: Let your yarn sit in the water. The yarn will start to absorb the dye from the water, and you will see you're yarn become colorful.
 Eighth: Once the yarn has cooled and absorbed all the dye, remove from the pans and place in a fresh pan of water, roughly the same temperature as the yarn. Rinse the yarn (You can use a mild soap to wash the yarn.).
 Ninth: Once your yarn is rinsed, gently wring it out to get as much excess water out of the yarn as you can. Then hang you're yarn and allow it to dry.
So I did.
Here's the process I used to Kool-Aid dye two skeins of Debbie Stoller's Full 'O Sheep 100% Natural Wool (colorway Little Lamb).
Tools Needed: 100% Natural Wool, Packages of Kool-Aid in color choice(s), Pan, Pot, Water, & Space for drying
 First: Unravel you're yarn and tie loosely. This will allow the dye to reach all the yarn.
Second: Pull out your Kool-Aid packages. I used two packs of Black Cherry and two packs of Lemonaide. (I had kind of tie-dyed effect with the yarn, where the color is lighter in areas. Next time I will use more Kool-Aid for a stronger, and hopefully more even, dying.)
Third: Soak your yarn in a very luke warm water bath. If the water is too hot it could start to felt and you don't want that.

Fourth: While you're yarn is soaking, you want all the yarn to get good and saturated, fill a pot with water and let that water start to warm on the stove.
Fifth: Just before the water starts to boil, remove from heat and drop in your Kool-Aid packs and give it a stir.

Seventh: Let your yarn sit in the water. The yarn will start to absorb the dye from the water, and you will see you're yarn become colorful.
 Eighth: Once the yarn has cooled and absorbed all the dye, remove from the pans and place in a fresh pan of water, roughly the same temperature as the yarn. Rinse the yarn (You can use a mild soap to wash the yarn.).
 Ninth: Once your yarn is rinsed, gently wring it out to get as much excess water out of the yarn as you can. Then hang you're yarn and allow it to dry.
Tenth: Roll, wind or ball your Kool-Aid dyed yarn and use!
There are a lot of great tutorials online for dying with Kool-Aid. Just Google How to Dye Yarn with Kool-Aid and you'll get about 1,250,000 results. I read many of these tutorials and watched some YouTube videos and thought, this is something I can do.
And it really was that easy.
Tuesday, March 1, 2011
A February Lady
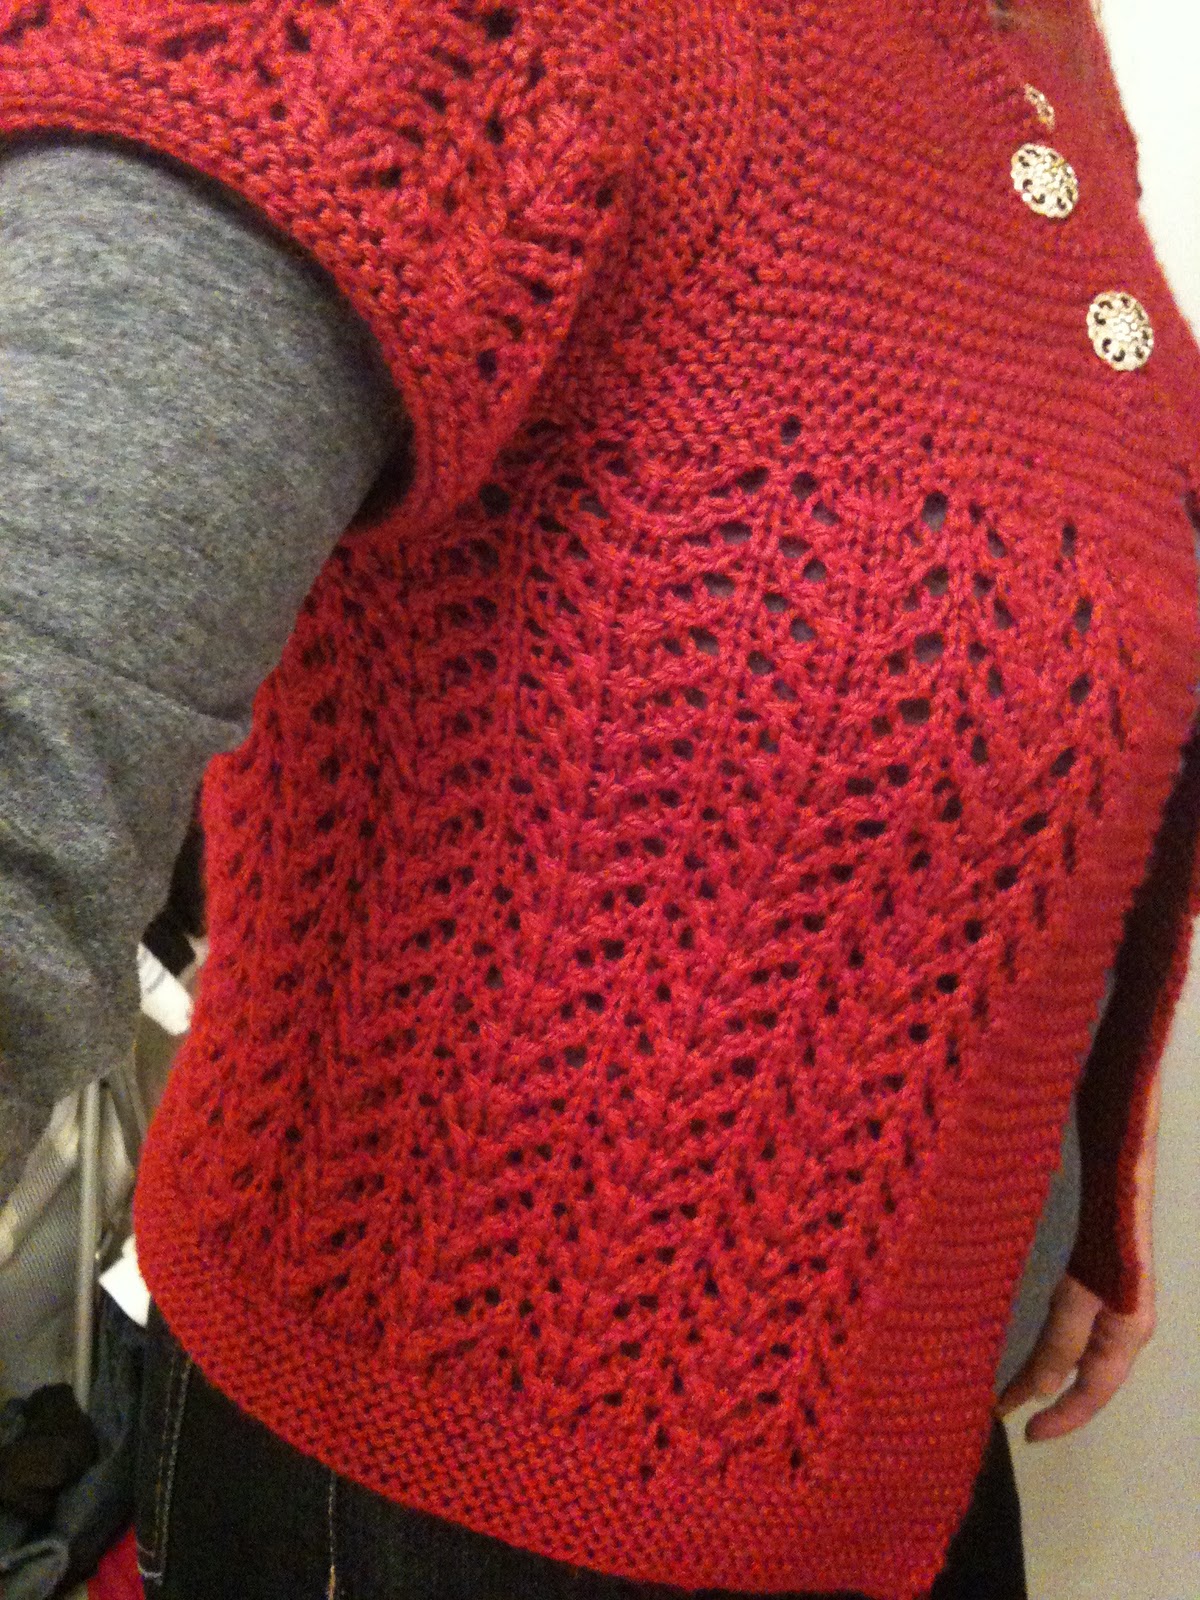
I might have mentioned, in my last post I think, that I was doing a few KALs. (Knit A-Longs) This was the KAL for the February Ladies Sweater that the Knit Wits Podcast was hosting for the month of February.
Since I'd been eying this pattern for awhile and loving the FOs I saw on Raverly, I grabbed my nose and dove in. A LOT of firsts for me. Well, the overall project was a first. My very first sweater.
But I took a big gulp and did my first buttonholes, My first sleeves, Not my first lace but it was a lot of lace! First time casting on stitches mid-row. All those firsts! And I loved it!
Loved it so much I can't wait to make more. This is a wonderful pattern, and is very easy to follow and memorize. At first glance, read through, it might seem a bit confusing for a first time sweater knitter. But it all comes together if you take your time.
Here are the notes, I made for the sweater while working it up. I don't have Pre and Post Block measurements yet, mainly because I haven't blocked it yet. But I'll update the post once I have them. Soon. Very soon!
FO Notes:
- Cast on for size smaller because I wanted that upsidedown V look to the sweater.
- I made my buttonholes all in the garter stitch yoke, because I wasn’t crazy about the look of the other sweaters where the last buttonhole was down into the lace. But I think next time I will space them out a little farther apart.
- I chose not to do the full length sleeves or even to the elbow. When I cast on for the sleeves I realized I wanted my instant gratification to last longer. Blame it on the rising temps here in the south. So I cropped the sleeves and by doing this I only needed two skeins of yarn.
- I did 18 repeats of Gull Lace for body and the 1.5 inch border.
- For the sleeves, I did 4 repeats of the Gull Lace and then 4 rows of garter stitch for the border. I didn’t want my border to overwhelm the lace. Especially with my cutting the sleeves so much shorter.
- Also for the sleeves I used a 16 inch cir. I couldn’t imagine using a 12 in cir like the pattern called for. At times working the lace was tight even on the 16 in.
Subscribe to:
Posts (Atom)