Showing posts with label Craft. Show all posts

Friday, October 24, 2014

And Sew On

Hi everyone! I hope this has been a great week for all.  I've had a pretty good one myself. There is always so much to do and so little time it seems like.  However, when I reflect back on the week, I feel like I've accomplished a good bit.

I finished one of my works in progress (WIP) and it looks even better than I hoped. Yay!  I also knitted some on my Happy Street shawl this week, which makes me happy as well.  Making progress.

But the thing I think I'm the most excited about is my sewing.  Awhile back, I ran across some Christmas themed fat quarters at Hobby Lobby.  Now, I have to admit, I've acquired some fabric stash over the years.  Not a lot because well, let's face it, I'm not a great sewer. But I do love a nice looking piece of fabric.  So when I came upon the Christmas fabric, I bought it.

That fabric has been in sitting in my fabric bin for almost a year.  Awhile back I made an attempt at sewing some project bags for my knitting projects with "meh" success. They were not awful, but certainly not what I would call good, quality bags.  And I really wanted to sew a nice bag.

So, I after my first attempt at sewing some bags I did what many other in my shoes would have done, I turned to social media.  I jumped on the Pinterest train and starting seeking out project bag patterns.

There were many.  Some more difficult than others. Some just right out of my novice comfort zone.  But all superduper cutearific!

As much as I loved all the bags I saw, the patterns to create those bags seemed a little bit, who am I kidding, a whole lot overwhelming.  Kind of like the first time I looked at a knitting pattern.  So I kind of just put my bags on the back burner again. With all my super cute fabric wasting away.  Which is a pretty sad thought, right?

Luckily, I found fresh mojo when I saw the super cool fabric and images via Instagram that Jasmine from the Knitmore Girls podcast was making for her projects.  I was compelled to follow the link she provided to this super neato tutorial on the In Color Order blog.

After reading through the steps, I hopped right to it.  I already had my precut fat quarters and since I'm in the middle of knitting Christmas goodies and Christmas socks, I decided they needed a perfectly cute Christmas project bag to nestle in.  So I got to work.

As I mentioned, I'm not a good sewer, but I do think there's hope of me becoming a better sewer with practice.  And since I am in love with these project bags, I can see myself practicing a lot in my near future.

This is my first finished bag. It is quite roomy.  I have two one skein projects down in there. I'm loving it.


Tuesday, April 8, 2014

A New First


I have a new first!  My very first handspun skein of yarn!

Can you believe it?!  It's not perfect but I love it. Very thin and then chunky in places!  Still, it's my first!

I'm already thinking of what projects I want to use for this

The roving was 1 oz of an 80% Merino 20% Tussah Silk.  It spun up nice and quick.  And I think I was starting to get the feel for the process there at the end. I spun using the drop spindle I purchased from LaTeaDa Designs a few years ago.

I'm really excited to use this now.  But first it's in the finishing process (wash and dry to set the spin {I'm learning so much!}).  Even though it's not ready for knitting yet, I can start contemplating what I want to use it with.  I only got roughly 45 yards.  For my first try, I was impressed I got that much.  So do I make a small critter like the Bluebird of Happiness, or use it as an accent on a hat or shawl? Decisions...


Monday, April 7, 2014

From the Stash

So this year started off as a stash down, sort of, kind of year.  I made a deal with hubster that since he agreed to take me to the Carolina FiberFest (which was this  past!) that until we go I would not buy new yarn.  Instead, I would work out of my stash and then stock up at the festival. 

I'm proud to say that with a few minor exceptions, yarn for a few hats (two of which will be for him), I have done that.

Below are photos are each project I've worked or am working that have all been knit from my stash so far this year.

First: I'm currently knitting a pair of Hermione's Everyday Socks.  I modified them to knit toe up and used a Fish Lips Kiss Heel.  I love this pattern and the heel. This will be a very favorite heel, I can already tell after one heel.  I'm knitting these using Happy Feet yarn.  I'm not sure of the colorway but it is very lovely! I know I'm going to call them my crushed gingerbread house socks.  I got this my head one day while looking at the yarn and it's stayed with me ever since.

I also knit Tin Can Knit's Barley hat for myself.  I love this hat.  It is their Simple Collection of patterns.  This is an ebook of eight fantastic, beginner patterns but there really is nothing beginner about the look of the patterns.  They are awesome. Fast and easy and they look great.  I knit this using some Impeccable yarn I'd picked up last year for my daughter's pumpkin hat.
I also purchased the ebook Summer Memories by Georgie Hallam.  This ebook contains four patterns of mother-daughter matching cardigans. I love them and plan on knitting all four. For the first two, Carousel and Summer Carnival, I'm using Knit Picks' Simply Cotton sport weight.  I purchased this yarn quite a while back when they discontinued the colorway. But I do love it.  This one is my daughter's sweater.  Mine is still on the needles and I'm hoping for a matching set by Mother's Day.  I was originally aiming for Easter but I still have a way to go on mine.

So next, is a matchy-matchy pair of socks for me and my daugher.  I love these stripped socks.  This is a basic toe-up sock using Paton's Kroy Sock yarn in the blue stripe ragg colorway. They are so awesome.  I love them.

Whew, are we done yet?  Well, almost.

I have also cast on using stash yarn the Follow Your Arrow lace shawl by Isolda Teague.  I have not made very good progress on this shawl because I am one of those types of knitters who has to be in the right frame of mind to knit lace.  And apparently I wasn't when I started this one the first five times. So, yeah, not that far along.  I will work on it here and there as I want a lace fix. Still, I am knitting this from stash yarn, Cascade 220 Fingering weight in a red and teal.  It is very pretty so far.

And finally! I cast on a tunic style sweater for my daughter.  This one is called Strimma by Yarn-Madness (aka Madeliene Nilsson). I'm using some Knit Picks Dishie in a red and eggshell.

So, that about sums up what I've knit from or am knitting from stash this year.  I think. As I knit along I will post more of my stash down 2014 progress.

However, in my next post, I'll most likely talk about about the Carolina FiberFest and what enhancements to the stash were made there. :)

Friday, March 18, 2011

Dying with Kool-Aid

Last year, I decided I wanted to give my hand a try at dying yarn.  I'd been seeing a lot of craft projects worked up with hand-dyed yarn and thought it looked so amazing.  The trouble with this plan is 1) I'd never dyed yarn and had no clue what to do and 2) Little fingers getting into the dye and getting hurt.  But then I saw where people had dyed yarn using Kool-Aid.  You know that drink from your childhood.  So I thought, Awesome!  This is something I can try and it's non-toxic.

So I did.

Here's the process I used to Kool-Aid dye two skeins of Debbie Stoller's Full 'O Sheep 100% Natural Wool (colorway Little Lamb).

Tools Needed: 100% Natural Wool, Packages of Kool-Aid in color choice(s), Pan, Pot, Water, & Space for drying

First: Unravel you're yarn and tie loosely.  This will allow the dye to reach all the yarn.

Second: Pull out your Kool-Aid packages.  I used two packs of Black Cherry and two packs of Lemonaide. (I had kind of tie-dyed effect with the yarn, where the color is lighter in areas.  Next time I will use more Kool-Aid for a stronger, and hopefully more even, dying.)

Third: Soak your yarn in a very luke warm water bath.  If the water is too hot it could start to felt and you don't want that.

Fourth: While you're yarn is soaking, you want all the yarn to get good and saturated, fill a pot with water and let that water start to warm on the stove.

Fifth: Just before the water starts to boil, remove from heat and drop in your Kool-Aid packs and give it a stir.

Sixth: Gently place your presoaked yarn in the Kool-Aid water.  Stir gently around to help the dye reach all the nooks and cranies of the yarn or just swirl around to help create a kind of tie-dyed effect.  Becareful not to cause too much agitation however, because you do not want to felt the yarn.

Seventh: Let your yarn sit in the water.  The yarn will start to absorb the dye from the water, and you will see you're yarn become colorful.

Eighth: Once the yarn has cooled and absorbed all the dye, remove from the pans and place in a fresh pan of water, roughly the same temperature as the yarn. Rinse the yarn (You can use a mild soap to wash the yarn.).

Ninth: Once your yarn is rinsed, gently wring it out to get as much excess water out of the yarn as you can.  Then hang you're yarn and allow it to dry.

Tenth: Roll, wind or ball your Kool-Aid dyed yarn and use!


There are a lot of great tutorials online for dying with Kool-Aid. Just Google How to Dye Yarn with Kool-Aid and you'll get about 1,250,000 results.  I read many of these tutorials and watched some YouTube videos and thought, this is something I can do.

And it really was that easy.

Tuesday, March 1, 2011

A February Lady

Here she is!  Isn't she won-der-ful?!

I might have mentioned, in my last post I think, that I was doing a few KALs. (Knit A-Longs) This was the KAL for the February Ladies Sweater that the Knit Wits Podcast was hosting for the month of February.

Since I'd been eying this pattern for awhile and loving the FOs I saw on Raverly, I grabbed my nose and dove in.  A LOT of firsts for me.  Well, the overall project was a first.  My very first sweater.

But I took a big gulp and did my first buttonholes, My first sleeves, Not my first lace but it was a lot of lace! First time casting on stitches mid-row.  All those firsts!  And I loved it!

Loved it so much I can't wait to make more. This is a wonderful pattern, and is very easy to follow and memorize.  At first glance, read through, it might seem a bit confusing for a first time sweater knitter.  But it all comes together if you take your time.

Here are the notes, I made for the sweater while working it up.  I don't have Pre and Post Block measurements yet, mainly because I haven't blocked it yet.  But I'll update the post once I have them.  Soon.  Very soon!

FO Notes:

  • Cast on for size smaller because I wanted that upsidedown V look to the sweater.
  • I made my buttonholes all in the garter stitch yoke, because I wasn’t crazy about the look of the other sweaters where the last buttonhole was down into the lace. But I think next time I will space them out a little farther apart.
  • I chose not to do the full length sleeves or even to the elbow. When I cast on for the sleeves I realized I wanted my instant gratification to last longer. Blame it on the rising temps here in the south. So I cropped the sleeves and by doing this I only needed two skeins of yarn.
  • I did 18 repeats of Gull Lace for body and the 1.5 inch border.
  • For the sleeves, I did 4 repeats of the Gull Lace and then 4 rows of garter stitch for the border. I didn’t want my border to overwhelm the lace. Especially with my cutting the sleeves so much shorter.
  • Also for the sleeves I used a 16 inch cir. I couldn’t imagine using a 12 in cir like the pattern called for. At times working the lace was tight even on the 16 in.


Wednesday, December 29, 2010

10 in 2010 ~ Knitted

I know I haven't posted in like a super duper long time.  I can't believe how crazy busy I have been.  Seems like I have been on the go nonstop since September. But the holiday season is almost over.  Just waiting on that New Year to pop on in and then things might settle down for a few.  One can hope right?!

Anyways, I thought I would write up a few year end posts.  Since I signed up for the 10 in 2010 challange on Raverly I figured I'd start there.  First thing I wanted to do with this challenge is take my knitting to the next level, maybe even do some personal designing and just hone some skills.  Secondly, I wanted to learn to crochet.  I've tried to crochet in the past but never could get past the chaining stage. So with those two goals in mind, here goes my first 10 in 2010 post. (The pattern links are to Raverly.  If you're not a member sign on up.  It's a great community and membership is free.)

10 in 2010 ~ Knitted

First, I tried my hand at jewerly.  A very simple necklace worked up using the I-cord pattern and Needle Loft canvas yarn. I was inspired to try this after doing some Etsy searches and seeing some of the handmade jewerly.


Second, I worked myself up some very comfy and warm slipper socks using my Knifty Knitter Loom.  This was my first loom project. And, so far, my last.  I haven't used the loom again since making these.  Guess I should pull the loom back out and work something up on it.


One of my next projects is a bit of tricky project.  It started out as something completely different than what it ended up being.  Sadly, this is the only photo I currently have this project.  I need to take a new photo and when I finally get one taken I'll update the post.  But what this ended up being is a poncho.  I've worn it a few times and folks seem to like it.  Well, at least they tell me they do. This is one of those personal designs I mentioned earlier.  Since I completely changed direction with this project halfway into it, I made the second half up as I went along and VIOLA! a new design is born.  But it's not perfected by any means.  Needs a lot of tweeking.  But I have thought about working on that by making a second. Maybe in 2011.


Another personal design.  I call it Gray Day Shawlette.  It's very warm and I want to work out some of the kinks in this one as well.

The Wham Bam Thank You Lamb cowl. Sadly, I wasn't crazy about how this turned out.  Could have been the yarn or the fact that I used a larger size needle.  Regardless, I still think I like the pattern and will work this up again.  My goal with this one was bust some stash, and in that regard, I did acheive my objective.

Next up, another personal design.  This is a small satchel I knitted for my mom for Mother's Day.


I was asked by a super, sweet little boy to knit him a 'water blue' scarf.  So that's what I did.  This was knitted up just using the basic garter stitch and holding two strands of Knit Picks Shine Sport yarn together.  If I've never mentioned this before, I love Knit Picks!  They are awesomesauce.  Their yarn is very reasonably priced and goodness gracious but I've fallen in love with their Harmony Needles.


The Black Widow Headband.  This was totally not the right yarn choice for this headband.  Way to small.  But I like the design and hopefully will bust some stash up next year and try it again.

Another stash busting project - The Log Cabin Washcloth.  I plan to make many more of these.  Not only did it bust some stash, but helped me learn the skill of picking up stitches.  I highly recommend this pattern.

This was a fabulously fun and funky project.  It's called the Fabulous Funky Fringe Scarf.  I actually purchased this pattern (and yarn Karabella Vintage Cotton) through my LYS (Local Yarn Store). I spied one they'd knitted up and had on display and after seeing it a few times while attending knit night, I decided I needed one.  I wore this to the Trans-Siberian Orchestra concert and loved it. Well, loved the scarf and the show.  I actually love this pattern and yarn so much I purchased some in black and plan to do a black and pearl scarf next year.  While working this pattern was also the first time I usesd Hiya-Hiya Bamboo Needles.  These were a pleasure to work with. I do recommend this needle as well.

So that is a total of 10 knitted projects.  However, that is not all of my 2010 pojects.  So here a few more completed projects for the last year.

My first in-the-round project- The Honey Cowl.  This one took me awhile to figure out.  I kept twisting my stitches and basically ended up knitting this cowl twice. It was a big lesson learned. On to a mini-rant concerning this project, the yarn I used was an acrylic yarn, James C. Brett Marble Chunky.  I saw it at my LYS and loved the colors.  I thought it would make a very nice, cozy cowl for the autumn months.  And for the amount of yardage in one skein the price is actually very decent. Only, halfway through my skein of yarn the ply changed (It was a two-ply chunky yarn).  Instead of being plyed with the same color, it was now plyed to two different colors.  Now, had the entire skein been plyed this way and my cowl been knitted in this fashion it wouldn't have been an issue.  But since I was halfway through my project this change really stands out.  I wasn't happy with this.  However, I do LOVE this cowl and this pattern.  I used the mid-size cast on.  I will knit this again and use the large size and a solid color yarn.

Another personal design.  This one turned out so much lovelier than I thought it was going to.  I found some Cascade Pearls Yarn on sale at my LYS, and I loved the colors and the uniqueness of the yarn.  It is a blend of cotton and rayon. I knitted the body of the caplet with two strands of the Cascade yarn held together and it has such a lovely drape and springiness to it. The collar is Bergere de France Teddy yarn.  It really made the finished object what it is.  I just love it.  Too bad, my daughter didn't love it as much.  She gets mad at it when she wears it.


And yet another personal design.  I call this the Half-Way Wrong-Way Cowl.  Simply because I messed up half way through the cowl and started knitting backward.  but it worked out great because it gave the front of the cowl some extra bulk and makes the buttons stand out.

Can you guess?  Yep!  Another personal design.  Not only did I work this up in my little brain, but I also dyed the yarn.  I plan another blog post to detail that funness.  The purse is really cute, but I think it is a more spring time purse so it's waiting patiently for spring to arrive.

One final project that I knitted in 2010 is the Pandora Scarf from the One-Skein Wonders book.  I have not taken a photo of the finished project yet.  But I knitted this one up using Ella Rae Bamboo Silk yarn.  It is much smaller than the pattern calls for.  I wear it as decoration more than anything else.

Yikes!  I almost forgot the South Park hat I knitted up for a friend of mine's little 9 month old baby.  I didn't have a pattern so I had to wing it with the hat.  And as luck would have it... No time to take photos of it.  It got wrapped up and placed under the tree before I could even think photo.  So maybe one day I'll get a photo of him wearing it.

Wow.  I think that does it for finished knitting projects in 2010.  Maybe I'll start a post of unfinished projects one day soon.  But for now, I think this will wrap up this post.  It's already ubber long.

Sunday, August 15, 2010

A New Knitting Project

I'm working on a new project.  A new personal design.  It's coming along pretty nicely and as soon as I am finished I'll post it.  But here are some stats and a sneak peek.

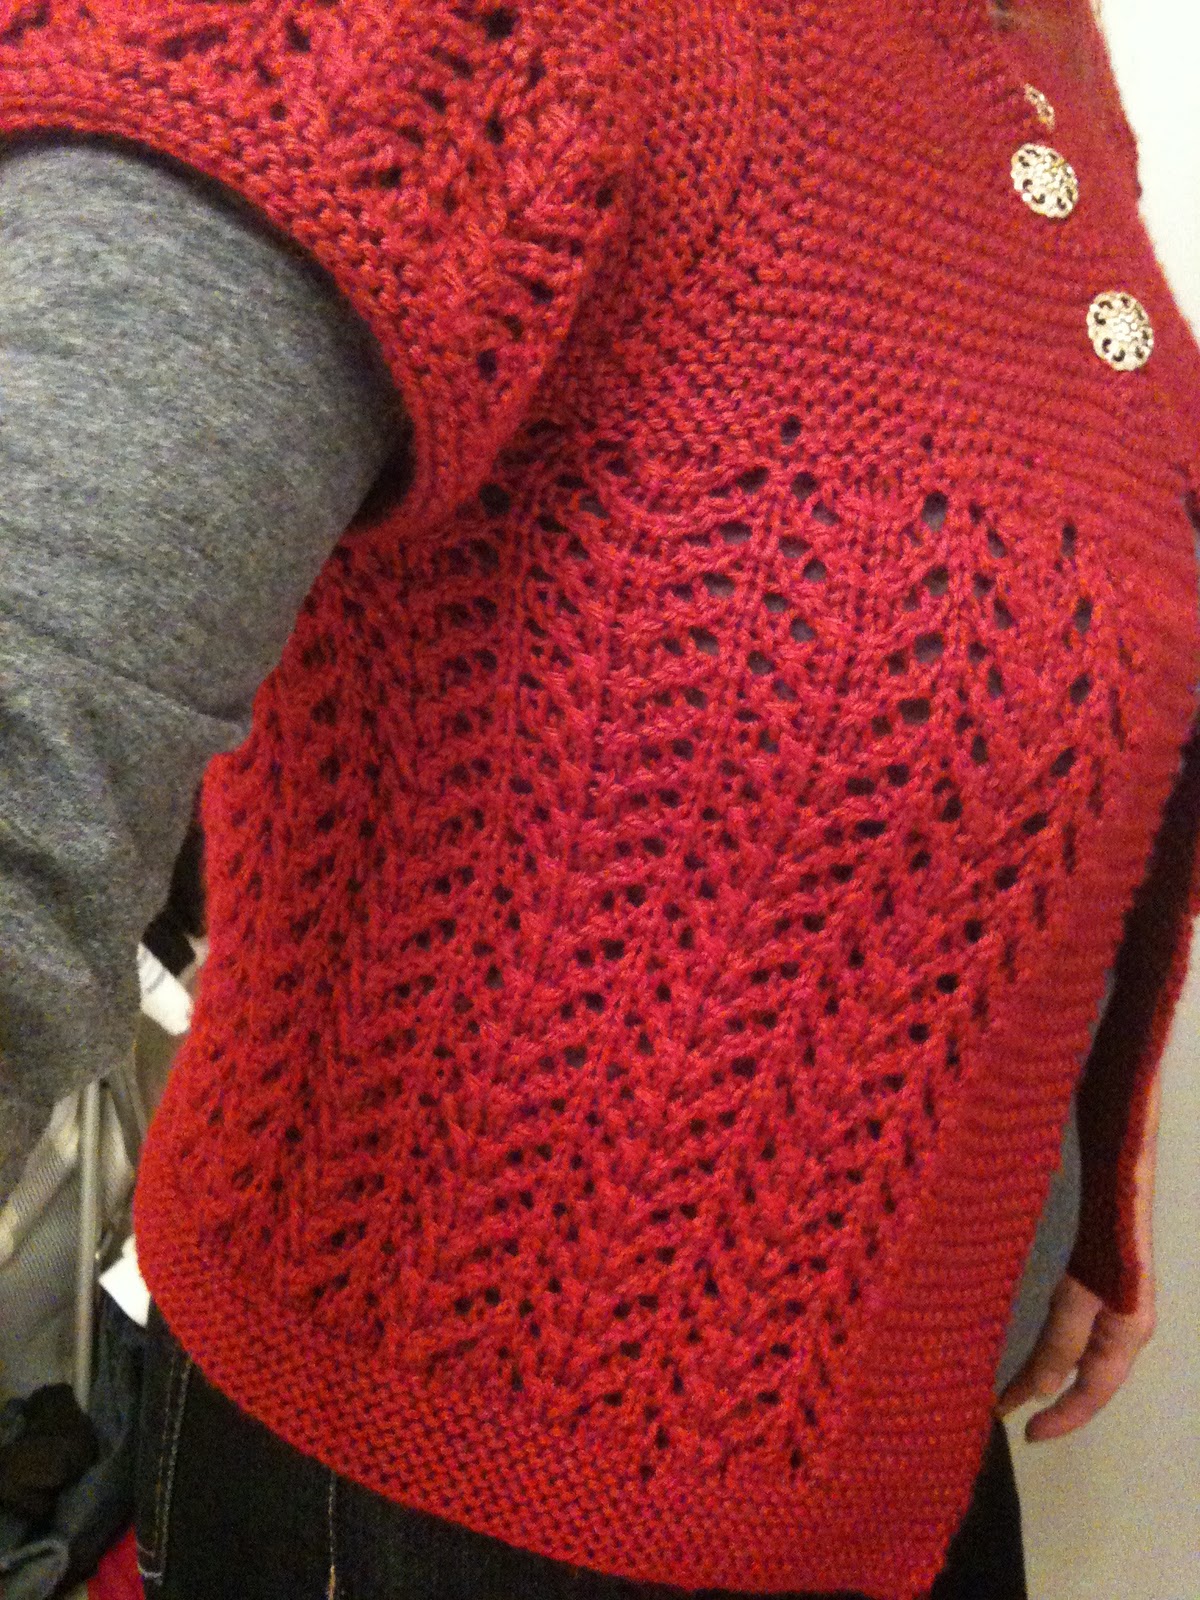
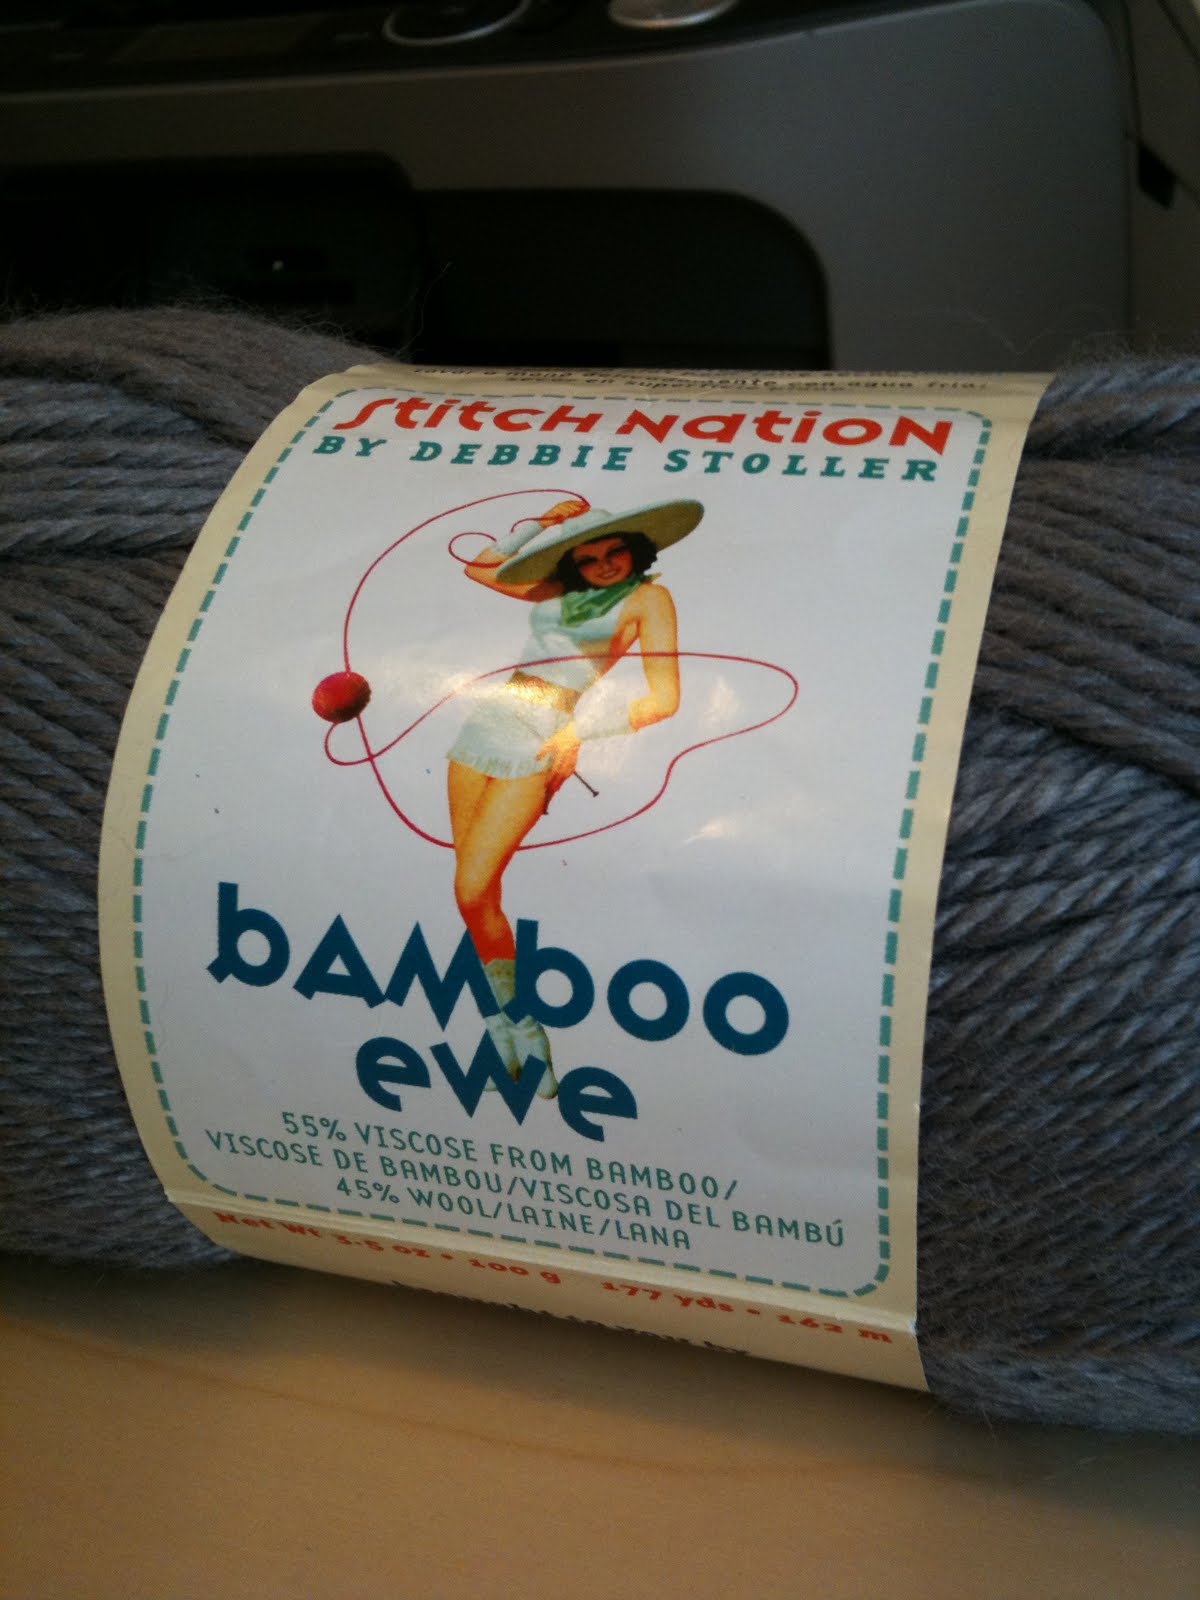
I'm using Stitch Nation Bamboo Ewe yarn.  It's a blend of 55% Bamboo and 45% Wool.  It's very soft and has a nice, natural stretch to it that is working nicely for this design.  Plus, it was incredibly reasonable.  So much so that I would have expected it have some acrylic in it, but it doesn't.

And now for the quick peek.


This photo was taken from my iPhone of the piece in process.

I know.  I know.  It doesn't look like much here.  But I'm loving the way it's coming together and hopefully you will too.

Tuesday, July 27, 2010

Faults or No, I Like It!

Before I dive right into what I was going to blog about today, I wanted to mention that the other night we grilled steaks for dinner. They were so good. But we had two huge steaks left over. I told C$ that we should make steak fajitas. So that's what we did. And oh my... what a great way to jazz up them there leftovers. They were soo yummy!

Anywho, that's not really what I was going to post about today, but I had to just go ahead and toss it out there.

What I'd planned to talk about today was one of my latest projects. See, I bought a sewing machine awhile back, when I found out I was pregnant. I had this crazy notion that I would make my own maternity clothes. Maternity clothes wasn't the only thing I was going to make, naturally. I was going to sew baby clothes andlearn to quilt and just do all kinds of super cool things.

And believe it or not, over the last year I have made a few things that have been kind of cool. But there is always a learning curve. And I am pretty much teaching myself to sew on a trail by error basis. That's why when something turns out pretty cool, I'm pretty darn pleased.

So today, I'm going to share with you one of those pretty darn pleased moments. Even with all it's faults, it pleases me.
To give some background, my adventure started out with the purchasing of a pattern for a cute summer outfit that I am in the process of working up. My goal with this outfit was to try and create something that could be used both for home and work. While I was out shopping for the materials needed to make the new outfit, I stumbled on some scrape cloth on clearance. I loved the color and so I bought it too. It wasn't that much and I thought, surely there is something I can make with this.

It's a very light green, with swirls of white throughout. After thinking about it, I decided that it would make a really cool contrast to the cranberry material I picked out for the outfit. So the idea to make a scarf was born.


I didn't have a pattern pattern, but I remembered seeing one I liked by Amy Butler that I thought was really cute. I had to make a few modifications from the original pattern. First I didn't have beads. So I just did a straight angled finish on the ends.

Also my cloth was not long enough to make the sash/scarf in one long solid piece. To remedy this, I measured out enough of the material to make two strips the same length, then halved each. Combining one half of one strip to the middle of the halved primary strip gave me just enough length to make the sash.

My thought, even with the now three pieces sewn together, it will still be cool.

So on with my sewing I went.
This is where my story starts to show just how newbie I am when it comes to sewing. First, I didn't seem to match up the sides just so. As you can see by the pictures below. The seems were off when I attached that middle strip of fabric (First photo). This caused a pucker on one side of the sash (Second photo). (Yes, I used pink thread to sew the seams. I loved the look against the green fabric).


Still, even with the faults, the sash is super cute and I think it will work and the pucker will be easily disguised. I'm looking forward to trying it out.

Now I'm thinking about making another one. One with a beaded fringe.


Tuesday, June 22, 2010

Itty Bitty Learning Experience


I'll post some more vacation photos tomorrow. But for today I wanted to discuss something else.

I've talked a little bit about my teaching myself how to crochet. This has been an ongoing thing for some time. I would get so far as to chain some but then that was it. I had no idea where to take it from there. And reading a pattern... Forget about it!


But not too long ago that Determination Bug jumpped up and bit me. I pulled out the hook and yarn and decided I was going to learn to crochet dog gone it!

That is when I sat down and worked up my "I Did It My Way Crochet Scarf". Just in time for the weather to turn hot. And I do mean hot. Mother Nature totally skipped Spring, and I don't think that was very nice of her.

But I digress.

After I completed my scarf, I decided I needed to jump right into another project. One that was a little more challenging, yet not too challenging. Hey, I'm still a beginner and not crazy!

So I searched Ravelry for a pattern. This time I decided I needed a pattern because, Hey, I'm still a beginner and not crazy! :) That's how I found the pattern for the Dot's Little Ditty Bag. After reading the pattern and looking at the helpful notes on Raverly, I decided to try the bag out. So I went for it.

It was after I'd been crocheting for a while that I realized that I was only crocheting through the top lop and that was probably not the correct way to be crocheting the bag. But by doing this, the bag was coming together with a little bit of flare. A raised spiral all the way up the bag. Only it was on the inside of the bag. So I just flipped the little ditty inside out and viola!

I like this personal touch.

One other thing I encountered was difficulty in marking my beginning stitch. So I ended up having to count the stitches. I think this was me being a dork though.

Once I finished this bag, I decided to try my hand at this pattern again. Yet this time I did quite a few alterations to the pattern. Hey, I might be a beginner, but I guess I really am that crazy. :P

One day soon, I'll post those pictures. That bag was quite the learning experience as well.

Wednesday, April 28, 2010

It's Just A Phase, Really!

The other day I told my hubby, C$, that I was going to buy some yarn for a project. It's going to be a simply 2x2 ribbed scarf for my friend's little boy. So he said to "Go for it". So that's what I did. I went out in search of the perfect, water blue yarn. And how I did that was Google Water Blue Yarn. I couldn't find a yarn that was exactly labeled as Water Blue, but I did find several yarns that were in the same water family. I finally ended up ordering Knit Picks' Shine Sport River Blue yarn. Which arrived the other day and is absolutely gorgeous. So soft and light weight, I believe it will be a treat to work with.
But because I loved the yarn so much and Knit Picks' prices are so reasonable, I told C$ that I really wished I'd ordered more yarn. He told me to go out and get what I needed. Well, need is a realative term. Because do I really need more yarn... Well, yes I did, but did I need it right then... maybe not. But that didn't stop me. I hightailed it right back out there and ordered more more more yarn. To my defense, the bulk of what I ordered is for another promised scarf. But I did order me up a little something special though.

When this new shipment of yarn arrived I was in heaven. It is so gorgeous! Even more so than the images on the website. I'm ultra excited about using this yarn.

Now, I have to stop here and go back a little ways in time. See, this wasn't the first yarn I've bought. I'd gone on another yarn shopping spree very recently where I bought yarn to coordinate to some fabric I'd bought to knit/sew a few sundresses for my daughter. So that was a total of 3 other skiens of yarn.

In total, in the last month, I've purchased 15 skiens of yarn. Yikes! I know, I know. Right?! I'm crazy. I have so many projects all bubbling up in my head that I want to work on them all right now! But I can't. I only have so many hours- Ha! Did I just say hours? I mean minutes in the day that I can actually sit down and work on a project.

So what in the blue blazes was I thinking this morning when I went to eBay? To look at yarn? And then actually bid? On not one but three (3!) different auctions for yarn?

Holy hell! What am I going to do with that yarn?!

I've already won one auction this morning. The other two are up in a couple of days. My bids on those two are not that high, so we'll see if I win. But I want to win. The colors are so awesome!

Seriously though. This is not an addiction. I swear that it is not. It's a phase. I seem to go through them ever so often where I have to buy yarn. I just have to. The more the better. Someone mentioned on Facebook the other day in realation to a friend's comment that you can never have too much stash. And that's my story today. You can never have too much in your stash!

Monday, April 26, 2010

Goings On

Not sure what to title this post so I'm just going to type it up and then see if a title jumps out and grabs me before I hit go.

It was a busy weekend around the old homestead for me with a lot of goings on. Saturday it rained pretty much all day long and on into the evening. We had a very brief time in the AM when it wasn't raining and my daughter and I ran out to run an errand. By the time we got back home, about an hour later, it was starting to rain again. So with that small exception, we stayed inside all day.

Which was ok with me. We starting trying to wean her off the bottle this weekend. She did ok for the first day but by mid day Sunday, she wasn't doing so well. She wanted her bottle and refused the sippy. She drinks ok out of the sippy if it's water or juicy. She simply will not drink her milk out of the sippy though. So I'm not sure what to do. It may be that we're trying to rush her. We'll have to wait and see I guess. But in the mean time keep offering that sippy cup!

The rain cleared on out making it possible for us to go to my nieces tee-ball game on Sunday. That was a lot of fun. Those little guys were absolutely too cute hitting that ball and running those bases.

And during the inbetweens I frogged one of my Knitted finished objects (FO). I decided I could use that yarn for a better purpose. And actually set out to do so. That better purpose is a new design I'm trying to work up. I'll be sure to let you guys know how it goes. :)

And on that note, I'll sign off for today. And chat at ya later.

Wednesday, April 21, 2010

Gulp! I Did It!

Yes, that's right. I did it!

Now you might be asking yourself what exactly it is that I did. Well, I just uploaded my scarf pattern to the Raverly database. I'm officially listed as a designer. YIKES!

That makes me kind of nervous. But at the same time it makes me kind of excited since knitting and crocheting and even designing has become a recent passion of mine. I've been thinking about writing down my Ode To South Park knitted hat design and posting it as well. But first I must remember exactly how I made it, which means pulling out the hat and reviewing it. It also means taking more photos because the only photo I have of this hat is very old and not very good.

So, this isn't exactly the post I was going to post today but it certainly took precendce over everything else when I took the plunge. So tomorrow I'll post about what I was going to post today. Now, I'm going back over to Raverly to look at my designer page again.

Monday, April 19, 2010

I Did It My Way Crochet Scarf

As I mentioned the other day, I created this scarf in my attempt at teaching myself how to crochet. It started out with me just wanting to learn the basic crochet stitch, or stitches since there were two basic stitches involved, the chain and the single crochet.


I call this scarf "I Did My Way Crochet Scarf" because well, I did it my way, without a clue as to what I was doing. And now I'm going to share that way with you all. I've never written up a crochet pattern before, so bear with me as I try to get this right.


I Did It My Way Crochet Scarf

Hook :
9.0 mm (M/N)

Yarn :
YA - 1 skein Lion Brand Hometown USA Pittsburgh Yellow
YB - 1 skein Lion Brand Hometown USA Honolulu Pink

Additional Materials:
Yarn needle to weave in ends

Gauge: I didn’t really check gauge on this project since I was just going with the flow.

Instructions:

With YA Ch 9

Row 1: YA starting with second st from hook sc 8 through top loop only ch 1
Repeat row 1 6 times.

**Row 7: YB sc 8 through top loop only ch 1
Repeat row 7 2 times

Row 9: YA sc 8 through top loop only ch 1
Repeat row 9 2 times

Row 11: YB sc 8 through top loop only ch 1
Repeat row 11 4 times

Row 15: YA sc 8 through top loop only ch 1
Repeat row 15 2 times

Row 17: YB sc 8 through top loop only ch 1
Repeat row 17 2 times

Row 19: YA sc 8 through top loop only ch 1
Repeat row 19 4 times**

**Repeat this alternating pattern until scarf reaches desired length

Then using YB sc 8 through top loop only ch 1
Repeat closing rows 6 times

Weave in ends.

All done!

So how’d I do in writing and relaying my first written pattern? Let me know. Also, if you happen to try the pattern out, I’d love to hear back from you.

Or if you'd rather I email you the pattern, I have it saved as PDF complete with a graphic display. I can forward. Just leave me a comment.

Friday, April 16, 2010

The Continuous Law of Learning

Or could it possibly be the Law of Continuous Learning?

Or the Continuous Learning Law?

Either way, I think the point of it is that we are all continuously learning something. I know as a new mom, I think I can still say that even though my daughter recently turned one, I am constantly learning something new. Life is never dull, and it seems like time moves much too fast these days.

Even though, that learning is perhaps the most important learning I'm doing these days, it's not the learning in which I'm going to talk about today. I was thinking the other day about all the things I want to learn that are personal things. Things for me, to help me grow as an individual. All the things I'm interested in and how I can improve and possibly put that knowledge to a better use for me.

Well, I am interested in crafts, and I do know how to knit. I've knitted several projects and even designed few of them myself. Which I'm kind of proud of. So my next step was learning to crochet. I wanted to learn for the longest time. And every time I picked up the hook and yarn, I couldn't make it happen. The only thing I would have at the end of the day to show for my efforts was a long chain of yarn. And even though the chain stitch is important, it doesn't really get you anywhere. You know what I mean? Not unless you know what to do with it after you have. That was the part I couldn't make happen.

I read instructional materials, books, etc. Nothing seemed to get the process through my thick skull. So finally one day I decided I was going to see if video would do the trick. YouTube here I come.

I found this very helpful video from the Knit Witch on how to do a single crochet. So I practiced. And I practiced. And I practiced some more, until I thought I might have it right.

Since I wasn't really sure what I was doing, or how to read a crochet pattern, I decided a simple scarf might be the thing for me to do to practice my newly learned skill. So that's what I did.

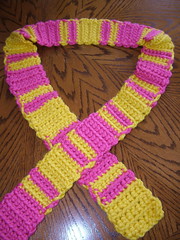
And the result is this scarf.

I'll attempt to type up the actual pattern I created in my head as I worked along the stitch process and post it soon. But in the meantime, I am extremely proud of my "I Did It My Way Crochet" scarf. I finally tackled the dreaded crochet and improved my skills.